
Honestly, I have never bake a cake using a rice cooker even thou I have heard people doing so. Why? Cause I have a oven at home? I mean, seriously, do you boil your soup in a rice cooker when you have the pot? (well, we did and we shall post the recipe in the next post!)
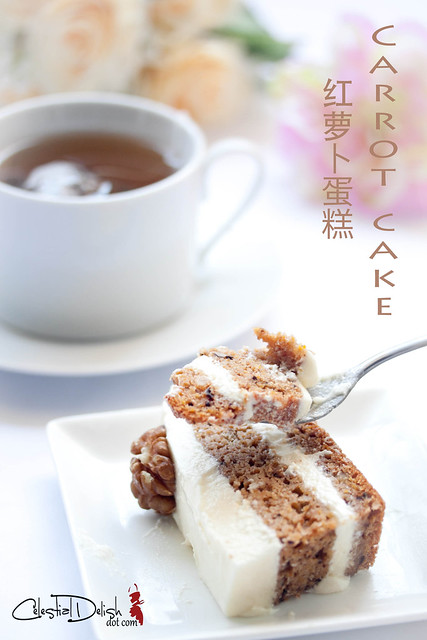
It has never come across my mind to bake a cake using a rice cooker, but I did. I was pleasantly surprised when the carrot cake came out perfectly from the Panasonic Rice Cooker, too decadent for words.
It was awesome! Much easier than expected and it came out really moist and soft. Best of all, removing the cake from the pan and cleaning-up was a snap!
Recipe: Baked Carrot Cake using Rice Cooker (红萝卜蛋糕)
Makes: 7.5" Round Cake
Ingredients for Carrot Cake:
• 128g plain flour
• 1 tbsp baking powder
• 1½ tbsp cinnamon powder
• 4 eggs, whites and yolks separated
• 80g sugar
• ¼ tsp salt
• ½ tsp vanilla extract
• ⅓ cup of Organic Ultra Light Virgin Coconut Oil (or vegetable oil)
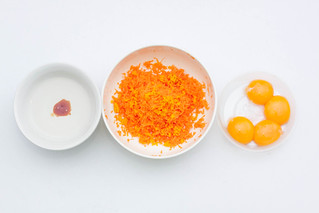
• 100g carrot, peeled & grated
• 1 tbsp orange zest
• 30g pecans or walnuts, toasted & finely chopped
Ingredients for Cream Cheese Frosting:
• 250g cream cheese, room temperature
• 113g unsalted butter, room temperature
• 210g icing sugar
• 1 tsp vanilla extract
Method for cake:
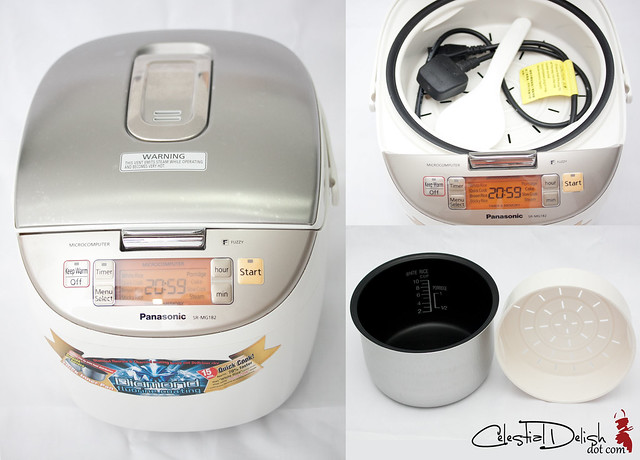
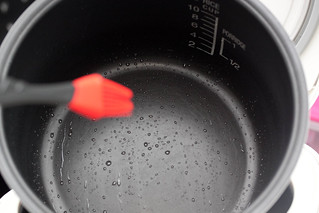
1. Coat the inner pan with butter or oil.
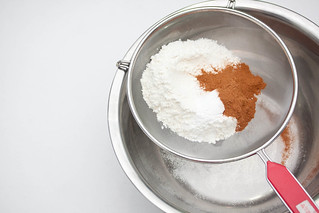
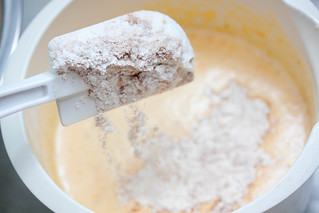
2. Sift the flour, baking powder and cinnamon. Set aside.
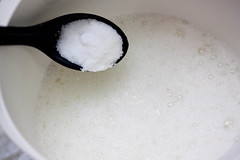
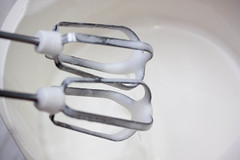
3. Whisk the egg whites using an electric mixer until foamy and white. Add ½ of the sugar, continue to whisk till incorporated and glossy. Add the rest of the sugar and continue to whisk till the meringue is soft-medium peak and looking silk-glossy. (when you lift the whisk, the tip should fall gently)
4. Add the egg yolks and salt, mix to incorporate completely. Follow by the oil and vanilla extract until it's incorporated. And the grated carrots and orange zest till mixed completely.
5. Incorporate the pecans/walnuts.
6. Using a spatula, gently incorporate ½ of the flour into the egg batter. Add the rest of the flour and fold gently until there are no lumps (DO NOT OVERMIX).
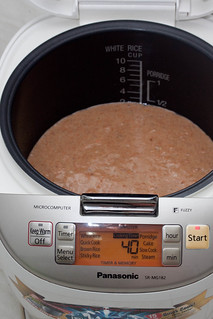
7. Pour the batter into the greased inner pan. Tap the side of the pan to release air bubbles. Place the inner pan in the rice cooker and close the lid.
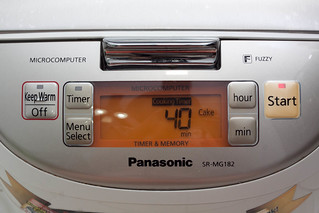
8. Select "CAKE" program (it's auto set to 40min - if you need to change the cooking time, you can easily change it by pressing the "Min" button). Press "START" and wait until the rice cooker beeps. You can give it a check at 30min, if it's ready you can off the rice cooker.
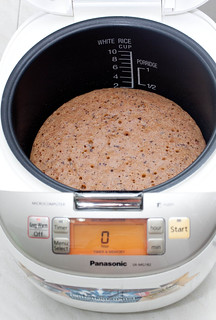
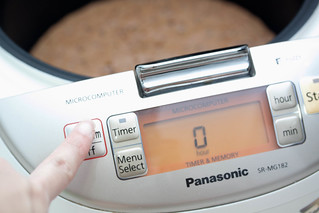
9. Press "Keep Warm/Off" button to turn off the rice cooker. Unplug the powder plug.
10. Take the inner pan out, let it cool for 2-3 mins... Turn the pan upside down onto a tray, the cake will easily slip out. Allow the cake to cool on a wire rack to room temperature.
While waiting for the cake to cool, prepare the frosting.
Method for frosting:
1. With an electric mixer, mix the butter, cream cheese and vanilla extract, about 3 minutes on medium speed until extremely light and smooth. Scrape down the sides and bottom of the bowl to ensure even mixing.
2. Slowly add the icing sugar on low speed beat until incorporated. Increase the speed to high and mix until very light and fluffy. (for easier frosting, you can harden up a bit in the fridge before icing, but i didn't)
*tips on frosting -> Click HERE
Method for Assembly:
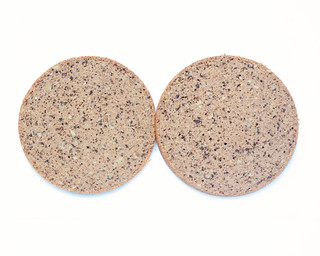
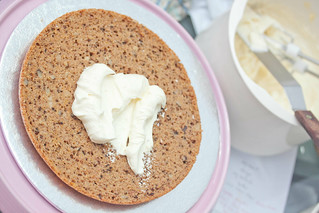
1) Cut the cake in half horizontally.
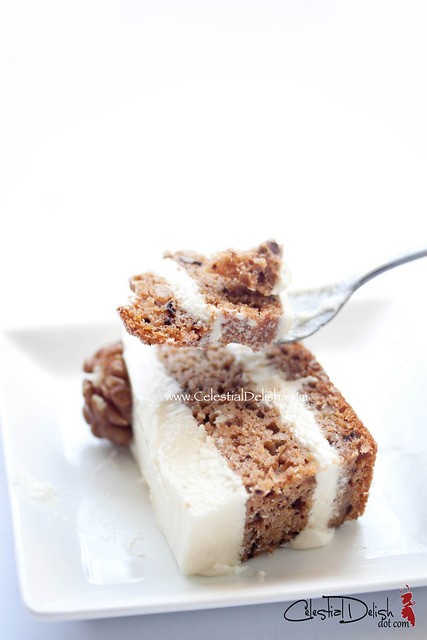
2. Spread some of the cream cheese on the bottom half and then place the second half on top. Use the rest of the cream cheese frosting and spread it all over the cake. Decorate as desire and chill in the fridge for few hours.


None of my colleagues believes the cake was made from a rice cooker! It maintain the moist for 2 days before it became drier. Everyone loves the cake, especially the cream cheese frosting. It was awesome to the max!
More information on the Panasonic Rice Cooker @ www.panasonic.com.sg.
Join the Facebook Page to keep updated of contests, tips, goodies and more @ www.facebook.com/sgpanasonic.
The “Vote & Win” contest for Singapore Blog Awards 2013 Panasonic Best Cooking Blog is still ongoing till 23 June 2013. Don't forget to support your favourite blogger at https://apps.facebook.com/panasonic_sg_vote/?vtype=gallery&fType=Best+Cooking+Blogs and stand a chance to win a prize!
WOW.. now Panasonic gives a new advance technology panasonic rice cookerit's having a non metallic base .
ReplyDeleteamazing information !!!
ReplyDeletenow i will make full use of my new Panasonic Rice Cooker
Thanks for sharing this post.it such a nice panasonic rice cooker product .i am happy to buy this.
ReplyDelete